Butler Arrows Cheerleading Craft & Vendor Show

butler pennsylvania craft show fundraiser

4th Annual Butler Arrows Cheerleading Craft / Vendor Event. February 22nd from 11-4. Located on the main street of Butler the Division 3 and 4 teams are hosting 40+ vendors to help raise money for Cheer Nationals and Camp this coming summer! We will have food for sale, a Chinese Auction and plenty of vendors to shop from. It is on the 3rd floor but is handicap accessible.

Main Street will be closed as it’s the Carved in Ice Festival downtown as well! There are two parking garages within walking distance! Please come on out and support these girls who have worked incredibly hard this season💜🖤

Posted on Leave a comment

Wet Bees – Beekeeping in the Rain

picture of rain against a blue sky

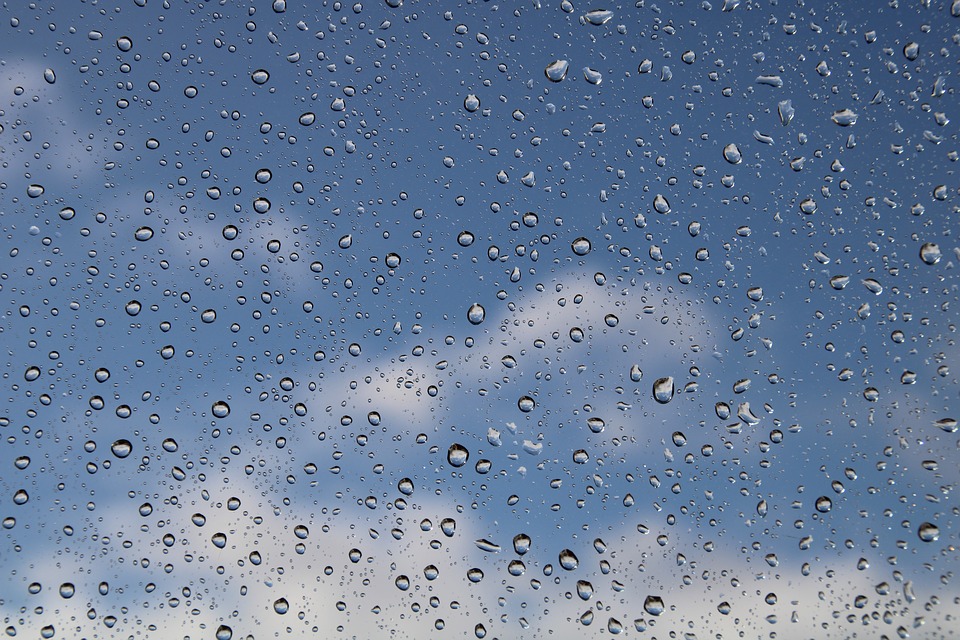
It feels like it has rained constantly these last couple of years.   It just goes to show that there CAN be too much of a good thing.  In this instance, it’s rain.

The rain, especially the thunderstorms, have completely wiped out any chance of a spring honey crop from the Black Locust.  If you are in an area where it is raining for several days straight, it is very important to feed your bees if you want any chance of a Summer crop.

When nectar and pollen stop coming into the hive, the Queen may cease laying, and Workers may even cannibalize brood.  This interruption in the brood rearing cycle will lessen or eliminate your honey harvest.  You need lots of bees to make lots of honey.

When the forecast looks miserable for long periods of time, don’t be afraid to throw a quart jar of syrup and a small piece of pollen patty onto your hives to ensure that the colony keeps laying eggs and rearing brood.  If you’re worried about honey contamination, simply take your supers off until the weather clears up.  However, one quart of syrup will most likely be rapidly consumed by the bees since no natural forage is coming into the hive.

Let me know your thoughts below.  Here’s hoping that you, and your bees, stay dry in this miserable weather.

Barn at Soergel Hollow Spring Craft Show and Amish Donuts

Come hunt treasures, eat sweets, and learn to fly fish!

Amish Donuts are for sale starting at 8am.

Craft Show Vendors begin at 9am.

Fly fishing clinic starts at 10am.

No parking fee, no admission fee.

Fly fishing clinic has a $5 donation fee benefiting the YMCA of Greater Pittsburgh.

Lake Latonka Fall Festival

Lake Latonka Fall Festival September 7, 2019

From their website:

Lordy, lordy, the Fall Festival is turning 40!!! The Lake Latonka Fall Festival began in 1980 as a craft fair. The large red activity barn and its grounds provided a perfect location for a fall craft fair, and scenic Lake Latonka provided the perfect backdrop. The original festival included mostly crafters, and has grown through the years to include a wide variety of crafters, businesses and non-profits from around the region. The festival has always relied on volunteers from the community of Lake Latonka to make things work. Our dedicated volunteers cut vegetables by hand for our famous homemade soup, which you can get along with other delicious homemade offerings in our kitchen. Parking and admission are free, so our guests can be good patrons for our loyal vendors. The festival features all-day live entertainment, plus an all-day raffle with over $1,500 in prizes. There is a winner every fifteen minutes! You can also join in the Chinese Auction thanks to the generosity of our vendors!

In 2015 we decided to try something that would make the festival larger and better than ever: We added a second location, in our community building overlooking the beach at Lake Latonka. The results have been tremendous! The festival now boasts right around 120 vendors, with more than ever inside in case of sketchy fall weather. A free shuttle bus runs all day between the two locations, which are only a mile apart. We also feature a water taxi, courtesy of Nye’s Marina, so guests can take a boat ride between locations on beautiful Lake Latonka!

Check out our vendor list, or if you want to become a vendor, fill out our contact form. You will find links to these items, as well as directions to our easy-to-find location just off I-79 outside Mercer PA. Be sure to click the link below and like us on Facebook, where we feature previews of our vendors and their products! We hope to see you at this year’s Fall Festival!

Earth Fest 2019 at PSU – Shenango

Come celebrate Earth Day with us at Penn State University Shenango Campus!

Free! All ages! Rain or shine – indoor event!

Featuring:

Live entertainment

Food vendors

Activities for families K-6

upcycled art competition & exhibit

Artists’ market

Information from environmentally-conscious local organizations & businesses

Penn State Berkey Creamery ice cream for sale

Schedule of events:

Live entertainment:

11 a.m. – Community Drum Circle — drums provided, or bring your own

12:15 p.m. — Christopher Rowlands — high-energy environmental songs and puppetry

1:30 p.m. — Author/Journalist Seamus McGraw — climate change and “cultural tribalism”

2:30 p.m. — K-6 upcycled art contest awards presentation

3:00 p.m. — Christopher Rowlands — high-energy environmental songs and puppetry

Activities for families (all day):

1st floor Lecture Hall Coral Reef Habitat Room — Hermitage School District Green Team & Shenango River

Watchers

Science Activities — Oh Wow! The Robert & Gloria Jones Children’s Center For Science & Technology

Plant A Seed — Penn State Shenango Agriculture Club

Food Vendors:

Metz Food Service

Haitian Sensation — Haitian food and coffee

Bluegrass Kitchen

Penn State Berkey Creamery Ice Cream

And more…

Collection of tattered and worn flags — Student Veterans of America

Upcycled Art Display — area K-6 students

Artists’ Market

Information Tables from Earth Friendly Local Businesses & Organizations

We hope you will join us for a day of fun and environmental awareness!

Posted on Leave a comment

So You Want to Try Beekeeping? What You Should Know Before You Start:

beeswax being formed on a frame

Fall or Winter is the perfect time of year to decide that you want to keep bees.  Why?  Because, if you don’t order your package or nuc before too long then they may be sold out before Spring.  It surprises me how many people think that beekeeping is a simple hobby.  It is far from simple, or cheap, but literally anyone can learn to do it.  Find a beekeeping class that is being given in your area.  They usually last one day and sometimes they even provide you lunch.  You can learn beekeeping from books, from mentors, from beekeeping clubs in your area, and even from the internet.  I wouldn’t advise taking all of your lessons from the internet, however.  Just remember, anyone can post anything on the internet without any proof or expertise.  Just look at me!

Basic Issue

truck load of beekeeping supplies

To get started, you will need some equipment.  There are many different types of bee hives out there, but for the purpose of this blog post we are going to assume that you are starting with the “standard”.  That is, a 10-frame Langstroth hive, named after it’s inventor Lorenzo Langstroth and patented in 1852.  I highly advise that you start with two hives instead of one.  This way you can take resources from one hive and give them to the other if needed.  For each hive you are going to need the following:

  • 1 Bottom Board (screened or solid)
  • 1 Entrance Reducer
  • 2 Deep Hive Bodies
  • 1 Medium Hive Body
  • 20 Deep and 10 Medium Frames with foundation
  • 1 Inner Cover
  • 1 Telescoping Top Cover
  • Some type of feeding system i.e. Boardman Feeder

A great book that I have read and recommended to others was Beekeeping for Dummies.  It really breaks down some of the jargon and terms used in beekeeping, especially for the equipment.

A Few More Things

Now that you have everything for your hives, you will need some additional equipment to aid you inn your beekeeping practices.

  • Bees sourced from a package, nuc, or even a swarm
  • Hive Stand
  • Hive Tool
  • Smoker and Smoker Fuel
  • Veil
  • Bee Jacket or Suit.
  • Method of Mite Sampling and Treatment

All said and done, you can easily rack up $500 in starting costs.  Beekeeping is not a cheap hobby!

I Bought Everything, Now What?

As early as April you are going to receive a phone call from your local Post Office that your bees have arrived.  They probably won’t be too happy but they will tell you to COME GET YOUR BEES!  Your package of bees will arrive in a screened box with a can of sugar syrup and a queen inside a separate cage.  It is important that you install this package as soon as you can.  Once you have the bees in the hive and the queen cage in place, then you close up the hive and check back in about 3-4 days.  You should find your queen released from her cage by the worker bees.  If not, then you release her yourself being careful that you point the cage downward onto a frame.  You want her crawling into the hive, not flying away!  Take it from me, it hurts seeing that expensive bug fly away from you.  With the queen released you then close up the hive, feed it some sugar syrup, and check back in about a week.  By that time, the queen should be laying eggs and you can assess her laying pattern.  Your first year you can check on the hive every 1-2 weeks to make sure everything looks normal and healthy inside.

Bee Informed

Now that you have your bees all set up, it is important to keep learning all that you can about these fascinating insects.  Find a mentor or beekeeping club in your area.  Attend seminars and conferences so that you can sit in on lectures given by experienced beekeepers.  They are more than happy to pass on their knowledge to upcoming “beeks” in the hopes that their instruction will help you keep your bees alive.  If you HAVE to use Youtube as your source of all beekeeping knowledge, at least watch those who are in your area.  Beekeeping strategies vary widely from the one section of the country to another.  Beekeeping is dependent on your LOCAL environment.

Don’t Get Discouraged

Your bees are going to die.  Whether because of you or because of issues out of your control.  You are going to make mistakes.  My first year beekeeping I lost every single one of my colonies.  Now, I average around 10% losses.  Learn from your mistakes.  Ask help from those with more experience.  Try different things.  Become a BETTER beekeeper each and every year.  Your girls will thank you for it.

Bee Safe.

Harry

Posted on Leave a comment

Fall Prep – Getting the Bee Hives Ready For Winter

mouse guard on bee hive

Fall is one of the busier times of the year for me in the bee yards.  Many beekeepers will tell you that the Beekeeping Calendar begins in August.  In a lot of ways they are right.  Starting in August, it is essential to make sure that your hives are healthy and prepared for the long winter ahead.  Winter is the time of the year when most beekeepers become a little anxious.  I personally lose very few of my hives to winter.  Hopefully I can share some of my tips to help you get yours through as well.

Mites

I treat for mites in early July-Late August.  My usual mite management regimen consists of MAQS (formic acid), followed by OA (Oxalic Acid) vaporization sometime between Thanksgiving and Christmas.  I call this their “holiday gift”.  Some people may argue that MAQS causes queen loss.  I don’t find that to be an issue.  For example, every one of my 64 hives received MAQS this year and only 4 lost their queen.  In her place, I found nice, fat queen cells which produced healthy, laying queens.  That equates to about 6% of my hives losing their queens, but they all requeened themselves successfully, and now those hives have a young, healthy queen going into winter.  That’s a win-win all around.  To minimize queen loss, you must observe the temperature restrictions that come with the MAQS packaging and ensure that your hive has good ventilation.

I experienced a very large mite drop on the sticky boards this year so I am glad I used such an effective (and natural) product.  Another natural, and effective treatment is Apiguard, or Apilife Var.  These treatments both use thymol in their formulations.  Whichever method you choose, it is important to keep your mite count low to ensure you have healthy bees that can better survive the winter.

Honey

We are very fortunate in this region in that we usually have a very nice Fall flow of Goldenrod and Asters.  In my area, the early Goldenrod starts blooming around the first week of August and will continue until about the middle of September.  The asters will bloom until the first frost.  You can always tell when your hives are bringing in Fall nectar because your hives will smell like old, stinky socks.  Fall honey has a stronger flavor than what most people are used to, but I personally enjoy it.

September 15 is the date I mark on my calendar to take my supers off of the hives.  I remove ALL extra hive bodies and get them into their configuration for how they will be wintering.  This gives the bees plenty of time to organize the nest and to securely seal up any cracks that could let in a cold draft with propolis.  I use 8-frame, medium hive bodies, and I stack them 4 boxes high for my winter configuration.  They say over 100 lbs of honey is needed for our winters.  I know my hives are heavy enough with honey when I can barely lift one side of the hive off of its stand.  As insurance, I feed the hives heavy syrup until they stop taking it or until the 1st week of October, whichever comes first.

I extract any full frames of honey and place the empty, wet supers on top of the hives, above the inner cover, to let the bees clean them out.  I try to avoid putting them outside for the bees clean them, as that will attract neighboring bees and any of their parasites/pathogens that are hitching along with them.  This time of year, I try to feed and pull supers very early in the morning or close to sunset to avoid starting a robbing frenzy.  Then, these cleaned boxes are put outside in direct sunlight to discourage any wax moth infestation.  So far this year they have not been a problem.

Mouse Guards

The first week of October I install mouse guards.  I do this on a nice, warm day when the bees are very active.  This ensures that there are no mice hiding in there who will be trapped.  I’ve used commercially made mouse guards which are very effective and not expensive at all.  I’ve also used half-inch wire mesh, cut to the length of the hive entrance and either stapled in place or bent in half and wedged into the entrance.  Whichever method you use, it is important to keep the mice out as they can cause a lot of damage in the winter if they find their way inside.

Insulation

Every one of my hives receives a rigid, 2-inch foam insulation board cut to fit below the top cover.  I put this insulation inside a box that rests on top of the hives, as a modified inner cover.  You could also use what’s called a quilt box.  This insulation on top of the hive prevents condensation from forming on the inside of the hive’s ceiling.  This cooled water could then rain down on the bees and kill them in short order.  Bees can survive cold winters.  Cold, wet winters….not so much.

Ventilation

Even with insulation, the moisture buildup inside of a hive is still a big problem.  You may have opened up a hive to find that your bees are dead. Lots of mold on the top bars and on the dead bees could mean moisture is the culprit.  To combat this, simply provide some sort of upper entrance.  This helps to vent the excess moisture out of the hive.  If the bottom entrance is clogged with snow, then the bees can still fly out on a sunny day.


These are simple strategies you can you use to help ensure that your bees make it through the winter months.  Just remember these key points:

  • keep your bees well fed
  • keep your bees healthy
    • MITE TREATMENTS
  • Keep your bees dry

I hope this post was helpful.  Winter is coming fast.


Bee Safe.


Cortland, Ohio Oktoberfest

Cortland, Ohio Oktoberfest 2018

The 2018 Cortland Oktoberfest will take place on Main Street, in Cortland, Ohio.

This community event will provide entertainment for all ages.

Come and enjoy the Arts & Crafts Show, MOE-mentum 5K/10K Trail Run/Walk, Art Alley, Family Games & Activities, Tangled Up In Brew Craft Beer Tasting, Music, Food, Entertainment and much more!

Posted on Leave a comment

The Scourge of the Honey Bee – The Varroa Mite

varroa destructor mite on honeybee

By now everyone knows that the honey bees are very difficult to keep alive.  You’ve heard about Colony Collapse Disorder and bees dying in record numbers.  What I bet most of you DIDN’T know is exactly why bees are dying.

People and Bees Don’t Mix

It’s true.  Humans have been a thorn in Mother Nature’s side ever since we expanded out of Africa and started walking upright.  For honey bees, there are many hardships that we put them through.

  • migratory beekeeping
    • spreads pests and diseases from across the country
  • pesticides
    • as well as fungicides, herbicides, and every other deadly chemical cocktail we spray everywhere
  • habitat loss
    • loss of quality AND amount of floral sources
    • loss of large trees to call home
  • bad beekeepers
    • yes, they exist!
  • global climate change
    • no, it’s NOT a conspiracy
  • invasive species of parasites and pathogens

I could definitely give my opinion on each of these points but today I am going to focus on the last one.

Invasive Species

World wide trade has it’s good points and it’s not-so-good points.  We now have the ability to travel and transport goods from one side of the globe to the other in a matter of days.  But that convenience comes at a cost.  One of those costs is the spread of a foreign species to an area that has no competitors or predators to speak of.  Infamous examples would be the Kudzu vine in the south, rabbits in Australia, and various species of Carp in American lakes and rivers.  What you don’t often hear about, however, is the unintended introduction of pathogens and parasites from other countries.

varroa mite on bee's back
Varroa mite is behind the bee’s head.

Origin Story

The Varroa mite is a parasitic arachnid not unlike a tick.  It was first discovered as early as 1904 in Asia on the Asian honey bee (Apis cerana).  The mite and the honey bee in that region have co-evolved over time so that neither species is seriously affected by the other.  During the 1940’s, the varroa mite was transported to Africa, Europe, and finally North America via beekeepers who brought their hives into these regions.  Once the beekeepers went back to their original countries, the varroa mites were now on a new host, the European honey bee (Apis mellifera) which we know simply as “honey bees”.   It was discovered in the United States in the mid-80’s.

Having a pesky hitchhiker coming on board a ship or a plane is one of the consequences of global agriculture which we still experience to this day.  Unlike the Asian honey bee, European honey bees had no evolutionary history in which to deal with this parasitic newcomer.  Unfortunately for the honey bee, the Varroa mite became a far worse problem than anyone could have foreseen.

One Nasty Bug

The Varroa mite loves to grab onto a bee and hitch a ride into the hive.  The mite then finds where larva are getting ready to be capped with beeswax.  The mite sneaks into the cell and hides underneath of the larva.  When the bees cap the cell with beeswax, the fertile mite lays an egg.  This first egg produces a male mite.  The “mother” mite then lays eggs which become female mites every 30 hours until the bee emerges from the cell.  These daughters then mate with their brother and exit the cell with the bee.  These impregnated females then hitch rides to another cell to start the cycle all over again.

varroa mites on bee pupa
Bee pupa infested with mites.

It’s the Little Things

What advantages did the Asian honey bee have that the European honey bee did not?  Why has the varroa mite been able to overrun bee hives so effectively?  Let’s explore that a little bit more.

  1. Asian honey bees have several characteristics that make living with Varroa much more tolerable.  Asian bees will swarm and abscond (abandon their home) much more readily than the European honey bee.  This causes what we refer to as a “brood break”.  Meaning, the bee’s reproductive cycle is suspended which, in turn, disrupts the mite’s reproductive cycle.  This slows down and restricts how quickly the varroa’s numbers increase within the colony.
  2. Asian honey bees have a shorter development time from egg to adult.  The Asian honey bee is a full-fledged adult in only 19 days while the European honey bee takes 21 days to mature.  That gives the Varroa mite two full days to pop out an additional offspring.  That one extra mated female mite per bee larva exponentially increases the mite population to very high levels.  The mite population can double every 3-4 weeks between spring and fall.
  3. Asian honey bees display a very high level of grooming.  They are constantly grooming each other and will shake or vibrate to let another bee know that they need groomed.  This helps to dislodge mites from the bees and interrupt their hitchhiking ride.
  4. Varroa mites feed almost exclusively on Asian honey bee drone (the male) larva.  In the honey bee world, the drone’s only purpose is to mate with the queen.  When Varroa met the European honey bee, they were able to feed on the worker larva as well as the drone.  Therefore, every function in the hive, from pollen collecting to nursing young bees, is weakened because of this parasite.  Also, more prey for the Varroa means more food and, therefore, quicker population buildup.

Oh!  My Liver!

It was previously believed that the Varroa mites fed on the hemolymph, or blood, of the honey bees.  Recent research from Samuel Ramsey, however, has shown that the mites are actually feeding on the fat bodies of the bee.  These fat bodies, containing vitellogenin, act as an organ that not only provides storage for extra food reserves, but they also produce royal jelly and provide hormone functions.  Such functions include:

  • regulating foraging behavior
  • act as antioxidants and help extend the life of the bee
  • regulate the insect’s growth
  • aids in immune system function
  • helps the bees to live longer and survive the winter months

So, as you can see, a honey bee that has had their fat bodies eaten by a parasite is a honey bee that is going to have some serious health problems.

The Bug Has Bugs of Its Own!

As if feeding on the fat bodies of the honey bee weren’t bad enough, the Varroa mite vectors as many as 20 different viruses to the bee when feeding.  The most damaging is Deformed Wing Virus, also called DWV.  In the photo below, you can see that the bee’s wings are shriveled and almost nonexistent.  A bee that can’t fly is … well …. not going to live for long.  It certainly cannot help the colony collect water, pollen, or nectar.  It cannot even help defend the hive.  Other members of the colony will most likely kick the diseased bee out of the hive.  This virus has developed into even more dangerous (virulent) strains thanks to the Varroa mite’s ability to hitch a ride to another hive.

When a virus becomes too lethal and kills its host before it can spread, then that lethal strain of the virus dies with its host.  However, when the virulent DWV kills a colony of honey bees, other bees from nearby hives come into the dead/dying hive to collect any leftover honey that is in the now undefended colony.  The Varroa mites that are carrying the virulent strains of DWV then hitch a ride on to these “robber” bees and go on to infect the next colony.  This usually occurs in the Fall when the mite’s population (and virus load) are at their highest.  A hive will die, the mites will hitchhike to another hive, and then that new colony will most likely not make it through the winter with all of the extra mites it picked up.

deformed wing virus on a honey bee showing shriveled wings
Look closely and you will see the shriveled wings.


How to Kill a Little Bug on a Big Bug

So here we have a tiny bug that lives on a small bug.  This is what makes it is so difficult to control the Varroa Destructor mite.  How do we kill it without harming the honey bee?  Better yet, how do we kill the mite without contaminating the hive, and the honey that we eat, with whatever chemical we use to kill the mites?  Unfortunately, we do not have a perfect solution yet.  Because of the increased virulence of DWV, if you do not control a mite’s numbers then the colony will die.  If a hive is left untreated, it runs a much higher risk of collapsing and dying than a treated hive.  Integrated Pest Management (IPM) techniques help to reduce the mite’s numbers but require a lot of work on the beekeeper’s part.  Thankfully, some organic acids are available to use inside of a hive.  The vapors from these acids are able to kill a large amount of mites while minimizing any damage done to the rest of the colony.  They also do not contaminate the honey or beeswax inside of the hive.

A little Hope on the Horizon

Thanks to the work of people such as Randy Oliver (http://scientificbeekeeping.com) and Samuel Ramsey, there has been a lot of great research conducted on Varroa mites and how to combat them.  If you’d like to help contribute to a worthwhile honey bee research project, please click here.

Also, there have been a multitude of breeding programs to try and breed a honey bee more tolerant to Varroa mites.  You can use these new Queens and breeding techniques in your own apiary to continue the breeding process.  In this way, you can develop a strain of bee that can survive a little better on its own.

You can use some very simple IPM techniques to help disrupt the mites’ breeding cycle.  The most effective, in my opinion and observation, are drone brood trapping and creating a brood break by splitting your colonies.

Honey bees and the pollination they provide are a very important part of our ecosystem and to our country’s agricultural system.  We need to breed a more resistant honey bee that can survive the Varroa mite infestation.  Until then, beekeepers will have to continue to scrap and fight with this scourge of the honey bee.


Please leave your thought or questions in the section below.


Bee safe.

Posted on Leave a comment

Homemade Soap – Why You Should Be Using It

different homemade soaps arranged on a table

Homemade soap is the healthiest and best option for you and your family.  I want you to take a look at a typical store-bought bar of “soap” that you have in your house or when you’re at the store.  Look closely at the label.  Do you see the word “soap” anywhere?  Chances are, you won’t.  Companies will label these as “beauty cream bar”, “deodorizing bar”, or something similar.  That’s because these products are not really soap.  They are a blend of chemicals, detergents, and surfactants with ingredients that are impossible to pronounce.  Why?  Because chemicals are cheaper.  Homemade soap, on the other hand, is the best choice for your skin and your health.  To further explain what is going on, let me first tell you what soap is and how it is made.

What the Heck is Soap?

Lye and fat are all that is needed to make soap.  Excavations of Babylonian settlements show that humans were making soap as early as 2800 B.C.  They would use fats or vegetable oils and mix them with wood ashes and water.  The ashes contained potassium hydroxide, a form of lye.  I’m not going to delve too deeply into the world of chemistry, so bear with me.

chemical reaction showing fat cells turned into homemade soap
Fat Cell + Lye = glycerin + soap salts

A fat molecule consists of 3 fatty acids attached to a glycerol backbone.  When sodium or potassium hydroxide (lye) react with the fat molecule, the fatty acids are stripped from the glycerol and form soap salts, or simply soap.  This process is called saponification.  The soap then mixes with the glycerin to provide a naturally cleansing, moisturizing bar of soap.  Now, making soap like this isn’t the cheapest method.  To cut corners, manufacturers have replaced oils and butters with detergents and artificial chemicals.  Companies started taking out the glycerol from their soap because they could make more money selling it to cosmetic companies.

Why do you want glycerol in your soap?

Glycerol is a humectant, which means it attracts and holds moisture from the air.  Therefore, it helps to keep your skin moisturized and prevent it from drying out.  Handmade soap contains all of the glycerin produced from the saponification process, so that you retain all of its skin-loving benefits.  Since the glycerin in homemade soap isn’t removed, it isn’t necessary to add any artificial detergents or surfactants.  What you then get is an all natural way to clean and moisturize your skin.

The Good and the Ugly

So, to sum up, handcrafted, all natural soap will usually contain only:

  • the soap salts (soap)
  • glycerin (formed naturally)
  • Essential Oils

smiley face saying yayy for using homemade soap


Commercial “soap” usually contains:

  • Sodium Laurel Sulfate (SLS) – a detergent, surfactant, and foaming agent.
    • known to be a skin and eye irritant
    • implicated in the cause of canker sores
    • used as a degreaser => strips oils and moisture from your skin!
    • many other concerns including endocrine disruption, developmental & reproductive toxicity
  • Triclosan/Triclocarban/Tetrasodium EDTA/chloroxylenol
    • antimicrobial agents
    • endocrine/hormone disruption
    • carcinogenic (cancer)
    • lowers immune response
    • the EPA registered many of these as pesticides
  • Dioxane
    • known carcinogen
    • toxic to the brain, liver, and kidneys
  • Formaldehyde
    • Known carcinogen
    • irritant to the skin, eyes, nose, and throat
    • banned for cosmetic uses in other countries
  • Parabens
    • hormone disruption
    • carcinogen
    • may cause neurological problems
  • PEG-6, PEG-8, PEG-40, etc….
    • very toxic
    • carcinogen
    • possible skin and kidney toxicity

frown face saying booo for not using homemade soap


Not So Pretty…..

Even the coloring of your soap isn’t safe!  Commercial soaps almost exclusively use D&C and FD&C colorants and dyes.  Because many of these are made from “coal tar” produced from the byproducts of coal processing, most of them have been found to be carcinogenic.  Additionally, coal tar usually contains heavy metals.  Handmade soap, on the other hand, uses natural ingredients such as herbal infusions, oxides, and micas to impart color and designs in a soap.

Something Smells Funny

Handcrafted soap isn’t only great for your skin.  It can produce benefits from aromatherapy due to the Essential Oils that are used to scent them.  You may have heard that mint has an energizing scent, or lavender is a very calming and relaxing scent.  Commercial soap, however, simply lists their scent as “Fragrance” which can be a large number of ingredients including parabens and phthalates.  We mentioned parabens earlier, which are carcinogentic.  Phthalates are mainly used in plastics to add strength and flexibility.  The CDC has said that phthalates have been found to cause reproductive problems in lab animals.  Further reports from other studies have linked phthalates to many health problems including asthma, ADHD, Breast Cancer, type II Diabetes, and on and on.  Women and young children have been cited as most affected by this chemical.  This is probably the scariest chemical in commercial soap.  Any and all soap produced by Harry’s Honey Pot that contains “Fragrance” instead of Essential Oils is PHTHALATE FREE.  I would never expose myself nor my family to those chemicals and neither should you.

In Conclusion

Homemade soaps use premium oils and, therefore, no artificial chemicals are needed to give you a cleansing, bubbly bar of soap.  They can come in a wide variety of scents not found in commercial soaps, and the Essential Oils have amazing Aromatherapy benefits.  A quality homemade soap uses natural colorants to make beautiful patterns that are great for gifts.  It’s clear that homemade soap is the winner when it comes to quality and safety.

The chemicals used by the big manufacturers are cheap ways to make their bars of soap harder, foam more, and “clean”.  But, “you get what you pay for” is true for many things and in this case it is evident that homemade soap is a much more safer, gentler, moisturizing, natural way to keep your sensitive skin clean and moisturized.

Shop here for your handcrafted soaps.

I hope I helped demonstrate how important it is to read the labels on the products you choose for you and your family.

Please leave any questions or comments below.


Bee Safe.